Wednesday, November 19, 2008

Take a Thug Take

"Takes" are a staple of cartoon humor, and I've put together a scene with seven in a row! Should be seven times funnier than any other cartoon!


I'm inclined to be selfish and do this scene myself, really get an opportunity to stretch some useful animation muscles. But I think instead, for the good of the project, I'll spread this one around. I'd like everyone involved (who's interested) to pick a number and do a thug take.

You'll need to design the thug first, and then stay a little within certain parameters.
  • You don't have to use the exact same number of frames that I did in my place-holder animation. Do what you need to do for your special take.
  • I'd like to say you can "go crazy", but not TOO crazy. It's a cartoony cartoon, but not the cartooniest cartoon. Something like this won't work in our context:

  • Every thug wears the same outfit of black body suit and ski cap.
Sign up today!

For your edification:
I've knocked out my thug take. Here it is moving...


And stills...


Build 18

There's been some progress.

I've been working on a "dead spot" in the animatic where UF was standing waving to the crowd for too long. I decided to have him vamp for his adoring fans with some karate moves. The scene is a lot of fun, and full of things animators hate! Crowd scenes, animated camera moves, and weird camera angles. I think I got this idea because I've just seen Kung Fu Panda. Loved it!

This version also features a new music edit. I wanted to build up the phoney super hero getting suited up, so they've added a little to the front of the song for me.

There are also several other updates throughout. Enjoy!

Wednesday, November 12, 2008

What's Expected of Animators?

This is an unusual project in that there's no budget, no schedule, and no real client. (Of course I'm hoping to please the band, but probably for the most part they might prefer I put less into it and be finished already) I want the finished product to be an animation showcase for the studio, as well as for everyone working on it!, and yet I too am anxious to finish.

With that competing criteria, it could be confusing to know how to handle your animation assignments. Well I'm the DIRECTOR, and I'm here to make it more confusing! The answer is, do what you'd like and we'll work from there. To suggest what that means, here's some examples.

Nobody took scene 10, so I assigned it to myself. Here's the animatic/storyboard:


The simplest thing would be to make a graphic with the thug's arms and legs flailing and just scale it up and off screen, much like the place-holder art. That might have served, but there was a lot more opportunity for fun animation. Here's what I did instead:


It's hard to see, but I really enjoyed doing some full animation (on 2s) of the thug flying through space, obviously not following the storyboards very closely, but having fun with the set up.

Here's another scene that I handled very differently:


Maybe you can tell there are no inbetweens between these poses...

Only some squash on the foot and some secondary on his cape and clothes. It's a very economical scene and I think it looks great that way!

So do what feels right for you and the scene! Send me roughs and check in if you have questions.

Saturday, November 8, 2008

Thug Designs

Anybody want to help with designing a half dozen (or so) thugs for Ultrafoot to send running scared?

Monday, November 3, 2008

Assignments

Since we're all doing this for free and I want it to be as fun and rewarding as it can be, whenever possible I'd like people to be able to pick their own assignments.

Here's what needs doing:


Scene 2
  • Clean up (Clean up on scenes 2 and 3 was done, but I think it could look a lot better)


Scene 3
  • Clean up
  • Background layout - interior of the costume shop


Scene 4
  • Clean up - My animation is rough, I know I'm asking a lot from clean up!
  • Background layout


Scene 5
  • Effects animation - the clean up artist put in an indication of leaves blowing around, I like the idea, but I'd like to work on something more dynamic, a bigger pile of leaves and some dust maybe.
  • Background painting


Scene 6
  • Add some bounce to the van
  • Flash adjustments to Ultrafoot's animation. The clean up artist got the right idea, but this needs a little finess. For example, you can see he floats up off the ground for a moment.
  • Effects animation - There's a puff of smoke when Ultrafoot takes off but I'd like to see it bigger, more animated and dynamic.
  • Background - we need a scrolling city street scene, nothing too fancy.


Scene 7
  • Slight repair to the run cycle animation


Scene 8
  • Combination of animation and clean up. Ultrafoot's zip in needs to be animated (this might be considered effects animation) His stamp and jump need assisting and cleaning.
  • The van's bounce into the air looks good, but it needs to land on it's side.
  • Background layout and even some background animation because I want to see the buildings jump a little when UF brings his foot down.


Scene 9
  • Animation


Scene 10
  • Animation of flayling thug
  • Background


Scene 15
  • Animation


Scene 16
  • Animation - Ultrafoot bolts awake and lifts his newly ultrafied foot.


Scene 18
  • Animation
  • Background/Effects animation - I want to see Ultrafoot knock a hole in the clouds


Scene 19
  • Animation - Ultrafoot's foot serves as a scene transition wipe.
Pick your favorite and let me know what you want to do!

Sunday, November 2, 2008

Backgrounds and Layouts

One of the things that drove me bonkers on Ruby Rocket was that there was almost no opportunity to properly compose the screen. I did the storyboards absolutely as fast as I could, often reducing the background to just a couple of slashes to perhaps indicate that something was back there. There was supposed to be a "layout" stage where the backgrounds and character poses would be tightened up before finished animation and backgrounds would be done. Didn't happen, and I was left trying to figure out how to squeeze the animation into cluttered and ill-conceived backdrops so that it could be seen. (This is all on me, and not a reflection of the terrific background work I got!)

We have an opportunity now to correct that mistake (and others). For many scenes, I'll ask for a background layout sketch, something simple and complimentary to the character animation. I'll drop those sketches into the animatic to make sure it's all working before doing a finished painting.

I'm looking for a fairly simple and cartoony style for the backgrounds, but also painterly, not flat shapes filled with ugly flat colors like you'd see on Family Guy or The Simpsons. (Funny shows, but hideously ugly!) Here's some inspirational examples:


Ruby Rocket backgrounds were very detailed and elaborate and I want to get away from that with Ultrafoot. I'd rather see attention paid to design and color, not a lot of detail. If you're working on backgrounds, imagine you have to make 20 of them in a month. That mind set should help keep the backgrounds peppy!

I could talk a lot about what it means for the background to compliment the animation, but the selfless, cartoon loving John K. has done it better:
http://johnkstuff.blogspot.com/2008/06/bg-layout-tips-for-nate.html
http://johnkstuff.blogspot.com/2006/10/eager-beaver-1946-functional-beautiful.html
http://johnkstuff.blogspot.com/2008/07/organizing-bg-layout-elements.html

And if you're up for even more, here's just every post he made with the label "composition"
http://johnkstuff.blogspot.com/search/label/composition

John K. is basically providing an animation production master class for free!

Tuesday, October 7, 2008

Inking

This is a cell from scene 2 in the rough animation stage.
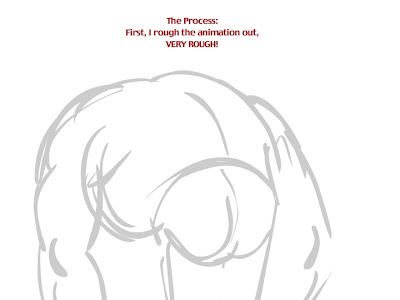
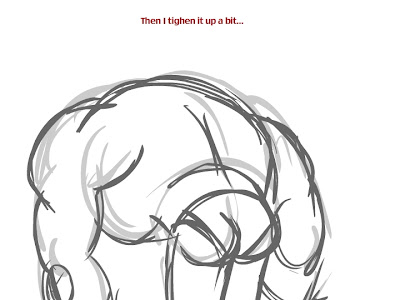
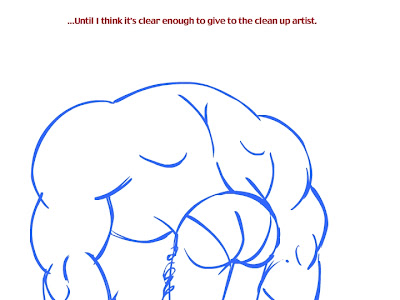
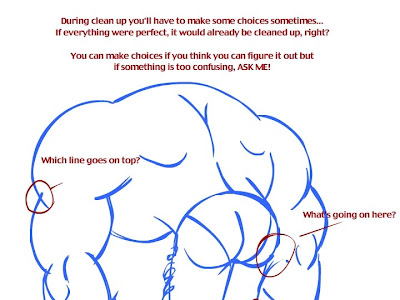
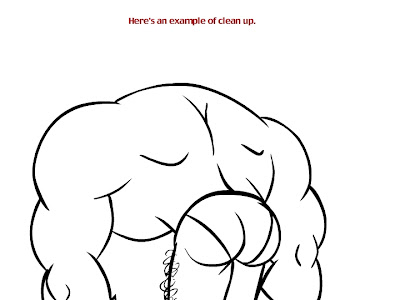

You can see I'm going for a thick, brush stroke kind of line.

You can use either Flash or Illustrator for clean up. We'll just see how it goes.

Some recommendations:
In Flash, you can use Object Drawing mode. This makes each individual brush stroke sort of a group, but not really. That is, it keeps each stroke you make separate from the rest of the paint, so you can grab it and manipulate it individually. But you can also drag the vectors around with the arrow tool, or erase. Give it a try!

Illustrator-
Illustrator has some advantages. You can make a much cleaner stroke, and you can easily manipulate it after you've drawn it with those handy vector bars...
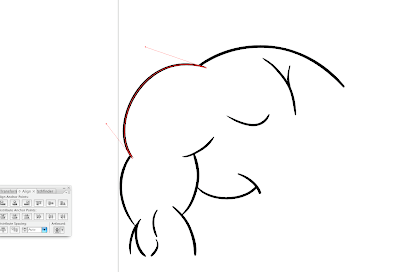
Makes it real easy to nudge your line around until it's juuuuust perfect! Definitely an advantage if you don't yet have a Cintiq. Problem is, I'd say it's much harder to know when it's perfect because you can't step through your frames very easily.

Process-
-Flash
Create a layer above the rough animation for your clean up. Where you need to separate layers, make holds, or convert items to symbols may already be indicated in the rough, but feel free to do these things as you see fit.

-Illustrator
There are probably good tricks for going back and forth between Illustrator and Flash that I don't know. Here's the process I've worked out.
  • You'll need to export the rough animation frames from Flash somehow. If there's just a few frames, you can simply export jpgs of those frames. If there's a lot, you might export the whole movie as a jpg sequence. Maybe this is something I'll do for some of you.
  • Open a new Illustrator file. Dimensions don't really matter
  • Select Cmd+1. This centers your stage and makes it fit on your screen. This is important for registration
  • Select File/Place... and select the first rough jpg. I like to lock the layer so I don't accidentally draw over it or move it.
  • Create a new layer for your ink.
  • Set your brush settings. You probably want between a 3pt and 6pt brush, depending on how small and detailed the drawing is. And you want to make the diameter pressure sensitive. That's what makes your line taper. You can set that by double clicking a round brush in the brushes window.
  • You can also adjust the "fidelity" which affects how many anchor points are made. A low fidelity number has fewer points and acts kind of like "smoothing" in Flash. Good for long strokes like in my sample. The higher the number, the more closely the stroke you make is going to follow the wiggles of your stylus by adding lots of points. You'll want a higher fidelity for drawing things with more detail like faces. You can find that dialog box by hitting enter when you have the brush tool selected.
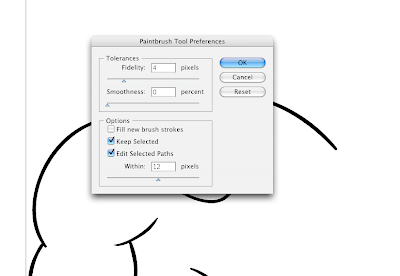

  • Clean away! Create new layers for each rough and a layer above it for the ink. Remeber to hit Cmd+1 before you do, or your jpg lands in a different place!
  • Here's the coolest thing! You can export a swf directly from Illustrator. When you've cleaned up your scene, hide all the rough layers so they're not included. Make sure visibility is on all your ink layers. Then select File/Export... and select Flash(swf) from the format options. Under the Export As drop down menu, select AI layers to SWF frames.
  • You can then import the swf you just made into Flash. All your nice clean vector artwork is there and registered! You find each stroke you made in Illustrator will be a group, so I usually do a big edit multiple/select all/break apart.
So, it's a process, but the Illustrator drawing tools are much better for the look I want than you get in Flash. If Flash had the brush options of Illustrator...well, that would be a happy day! This would all be easier and more fun if we were all in a nice big office and got to actually work together. Another happy day to look forward to.

Here's a lot more FANTASTIC information about inking from John K's blog:
http://johnkstuff.blogspot.com/search/label/inking

Let me know if you have any questions! Assignments going out soon!